


Written by Garrett Sammons
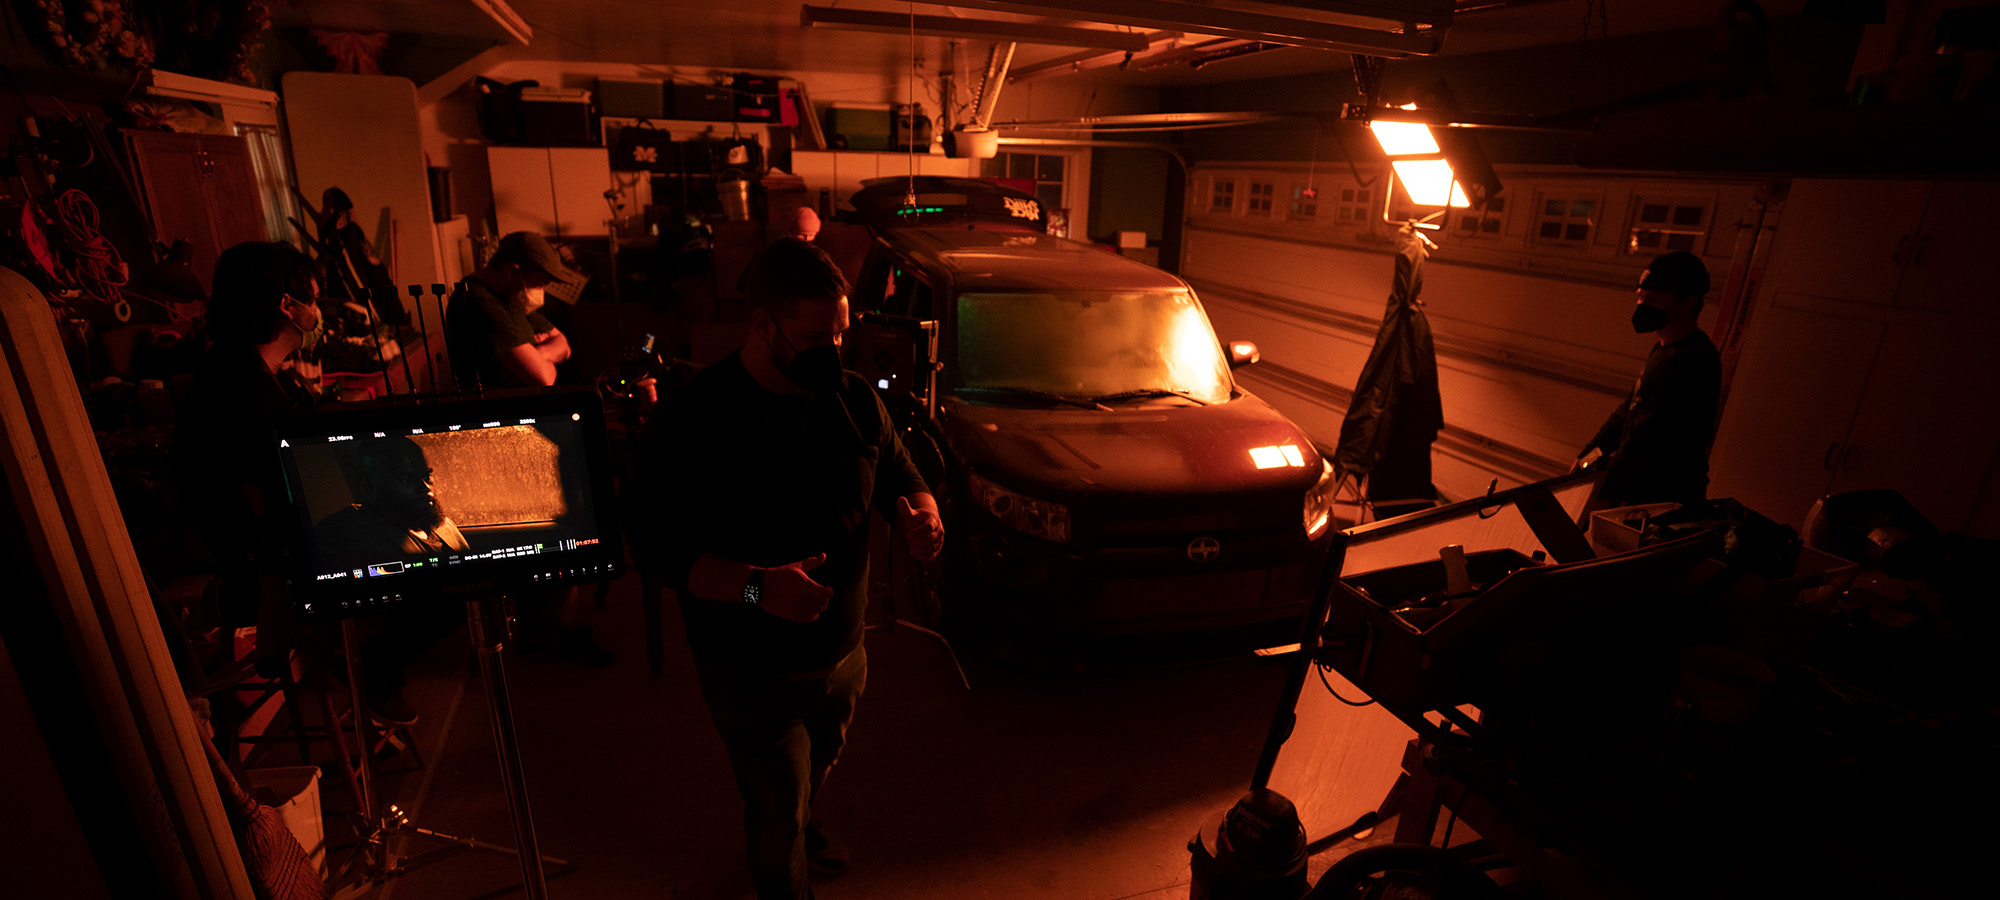
As a cinematographer, the challenge of transforming ordinary environments into extraordinary settings that tell captivating stories is exciting. In this blog post, I will share how we converted a bright, sunlit garage into a moody, rainy night-time scene for a car shoot. Though we used Gemini products for our demonstration, the techniques discussed are applicable to any lighting setup you might have.
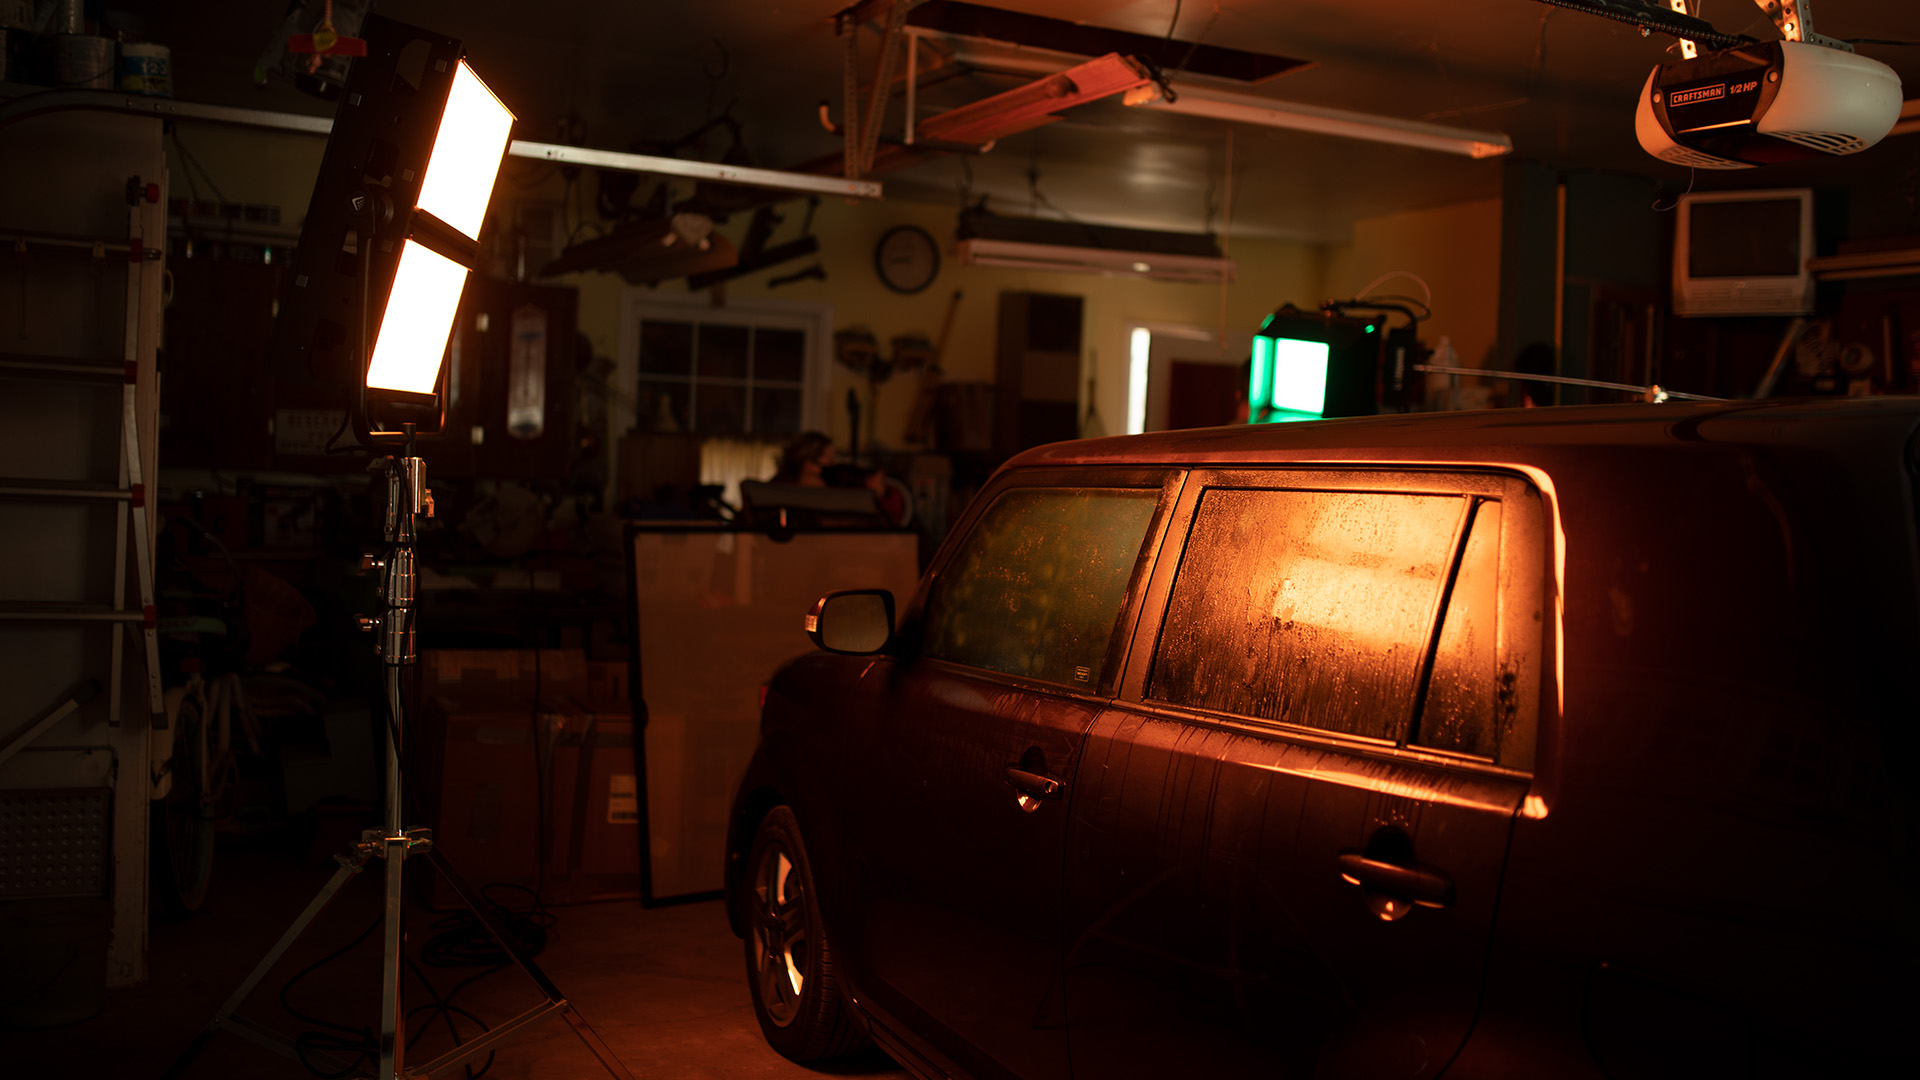
Before we break down this setup, let’s take a look at our final scene.
Controlling Natural Light
Our first task in transforming the garage was to control the natural light coming in through the windows. We used a combination of blackout materials and diffusion fabrics to block the daylight, creating a dark environment that mimicked nighttime. This controlled lighting environment allowed us to manipulate the light to our desired effect.
To further enhance the illusion of rain, we applied a mix of glycerin, water, and temporary dulling spray to the windows, which created a frosted glass appearance. The addition of sound effects and subtle visual cues in post-production helped solidify the perception of rain.
Designing the Lighting Setup
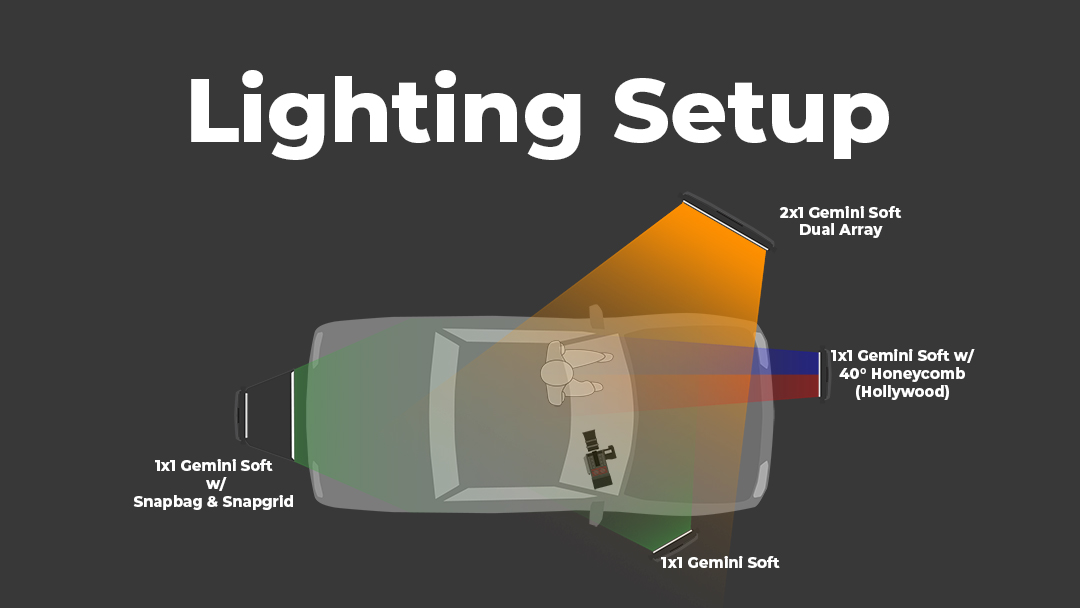
For the key light, we placed two large soft panel lights in a dual array without any modifiers to act as our key light. To create a realistic and immersive atmosphere, I aimed to replicate the look of a sodium-vapor light commonly found in parking lots and along roadsides. These lights emit an intense orange hue that contributes to the distinct ambiance of nighttime scenes. By placing the two fixtures in a dual array, I had ample light output to work with.
The color tuning capabilities of the lights allowed me to dial in the exact shade of orange I wanted, perfectly emulating the sodium-vapor light effect. This attention to detail helped to enhance the scene’s believability and create a captivating visual environment for the car sequence.
While our primary goal was to create a moody, atmospheric scene using a reverse key light, it was essential to maintain some level of detail on our subject to prevent them from appearing in complete silhouette. To strike this balance, we utilized two smaller soft panel lights as fill lights, working together to provide soft, yet directional illumination.
The first fill light was positioned behind the car with the tailgate open to gain full access to the interior. This light was equipped with a softbox and grid, creating a gentle but focused beam that filled out the space inside the car. The second fill light was placed just in front of the car’s A-pillar, fitted with a 40° honeycomb to minimize spill and maintain control over the light’s direction. Like with the key light, I added a teal hue to the fills. This use of color complemented and contrasted the orange of the key.
By carefully positioning and modifying these two fill lights, we were able to achieve a beautiful wrapping effect on our subject, maintaining sufficient detail while preserving the atmospheric quality of the scene.

The final touch to our car scene was the addition of an effects light to simulate emergency vehicles passing by our subject. We achieved this by “Hollywood-ing” a smaller soft panel light, a term that refers to a person holding and manually moving a piece of equipment—in this case, a light—to create a specific effect.
The Gemini we used had a suite of built-in effects, including an Emergency Lights setting, which was ideal for our purpose. We attached a 40° honeycomb to the fixture to minimize spill and maintain control over the light’s direction. With a production assistant holding and maneuvering the light across the vehicle, we were able to create a convincing impression of emergency vehicles driving past.
The combination of the carefully tuned key light, fill lights, and effects light resulted in a visually striking and atmospheric scene, enhanced by the illusion of passing emergency vehicles, which added depth and narrative intrigue to our car sequence.
Lighting Bright and Grading Dark
In our car scene, we intentionally lit the environment brighter than what might be expected for a nighttime setting. The primary advantage of this method is that it captures more detail in the scene, which can be manipulated during the grading process to achieve the desired level of contrast and mood. By having a well-lit scene to begin with, it’s easier to darken specific areas and enhance the overall atmosphere without sacrificing image quality or introducing unwanted noise.
Furthermore, this approach provides better control over the shadows and highlights, preventing the loss of important visual information. For example, in our car scene, we needed to preserve detail in both the vehicle’s interior and the subject’s face. By lighting the scene brightly and then grading it darker, we ensured that these details remained visible, and that the overall visual quality was maintained.
Light Spaces, Not Faces
Creating depth and dimension in a car scene requires a thoughtful approach to lighting, with an emphasis on shaping the environment rather than directly illuminating the actors’ faces. By focusing on lighting spaces, you can craft a more visually engaging and dynamic scene that draws the viewer’s attention to the overall composition.
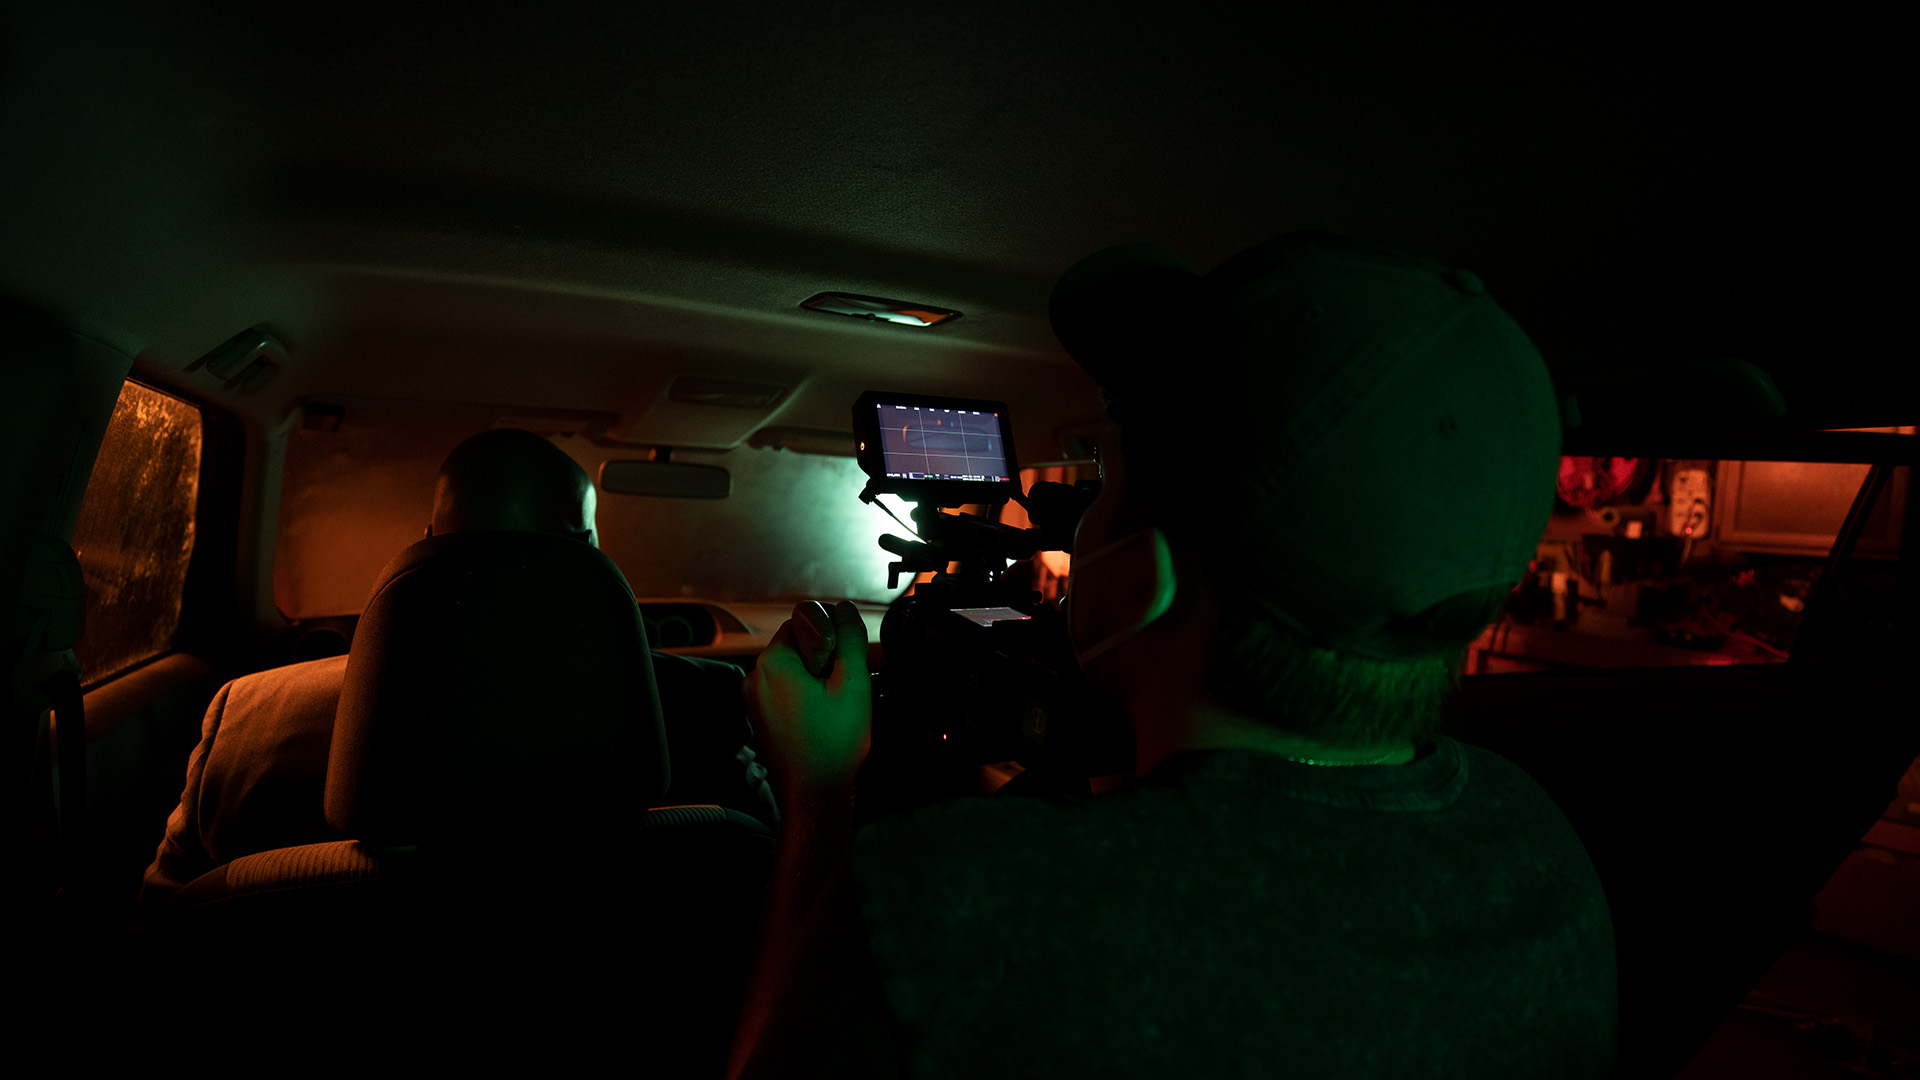
In our night-time car scene, we aimed to create a moody and atmospheric setting. By directing our lighting efforts toward the spaces within the scene, such as the car’s interior and the surrounding environment, we were able to achieve a more immersive and natural look. This approach helped to accentuate the contours and textures of the vehicle and the subject, as well as the reflections and shadows that contributed to the scene’s visual depth.
For instance, rather than placing a light directly on the subject’s face, we used fill lights to softly illuminate the interior of the car and the subject’s features, maintaining the moody atmosphere while still preserving detail. This indirect lighting technique not only added dimension to the scene but also allowed us to highlight important visual elements without making the lighting appear too obvious or artificial.
Additionally, by concentrating on lighting the spaces within the car scene, we were able to guide the viewer’s eye through the frame, enhancing the narrative impact of the sequence. This method of shaping the environment through light is a powerful storytelling tool that can help convey emotions, establish atmosphere, and elevate the overall cinematic quality of your car scenes.
Managing Reflections in a Car Scene
Dealing with reflections can be challenging when lighting a car scene, as they can distract from the narrative and detract from the overall visual quality. To tackle this issue, a combination of techniques can be employed, ensuring a polished and professional result.
One essential tool that every cinematographer should have in their kit is a polarizer filter. This versatile accessory can significantly reduce reflections on the car’s surface and other reflective elements within the scene, allowing you to maintain control over the visual impact of your lighting setup. In addition to a polarizer filter, neutral density filters are also invaluable for managing light levels and achieving the desired exposure.
Another effective way to minimize unwanted reflections is by elevating your lights. By raising the fixtures higher, you can direct the light in a way that avoids creating distracting reflections on the car or other surfaces in the scene. This adjustment allows you to maintain the desired mood and atmosphere without compromising the overall visual appeal.
Conclusion
In summary, crafting a captivating and visually engaging car scene relies on a combination of thoughtful lighting techniques, careful attention to detail, and the right tools for the job. By employing dynamic lighting setups, focusing on illuminating spaces rather than faces, and strategic light placement to manage reflections, you can create scenes that tell a compelling story and capture the viewer’s imagination.
Furthermore, don’t be afraid to experiment and push the boundaries of your lighting techniques. By mastering the art of lighting bright and grading dark, you can gain greater flexibility in post-production and elevate the overall quality of your car scenes. And by continuously refining your skills and embracing new approaches, you’ll be well-equipped to create memorable, atmospheric car sequences that leave a lasting impression on your audience. Always keep in mind that the brand of the lighting equipment is secondary to the techniques and approaches you use to create a visually stunning scene.
If you missed our livestream covering this topic in detail, check out the below recording.